
Disclosure: This post may contain affiliate links, which means I may receive a commission if you click a link and purchase something. Please check out our disclosure policy for more details.

To say I’m addicted to applique may be a bit of an understatement. I’m always trying to come up with new ways to apply it to my makes and I’m always on the lookout for new techniques I haven’t tried yet. This idea came from a late night sewing session where I had the perfect panel for ”coloring” but I wasn’t quite sure how to go about doing it. I tried a few different ways to sew on the appliques, including cutting the individual tiny pieces out and sewing them on but I soon realized that this wasn’t going to work, and was much too time-consuming. So I thought about reverse applique and how the same principle could technically be applied here but in the reverse sense. (Hopefully, that makes sense lol. If not, don’t worry because I’m going to explain it!)

The first thing I did was flip my panel over so the back side was facing up and I held it up to the light. I could clearly see the lines of the graphic through the fabric so I traced the pieces I wanted to applique with a washable fabric marker. Next, I cut a small piece of my applique fabric, a little larger than the area to be appliqued, and placed it on the front side of my panel, over the area to be appliqued. Place it right side up and pin it in place. *Be sure to place your pins on the wrong side of your fabric, since this is the side you will be sewing on.
**In these photos I’m not using a stabilizer because this was my first try and I figured it would be easier to seam rip if I needed to without it. I would recommend adding a lightweight cut away stabilizer to the back side of your panel before stitching to help support your applique and stitches on the knit panel though.
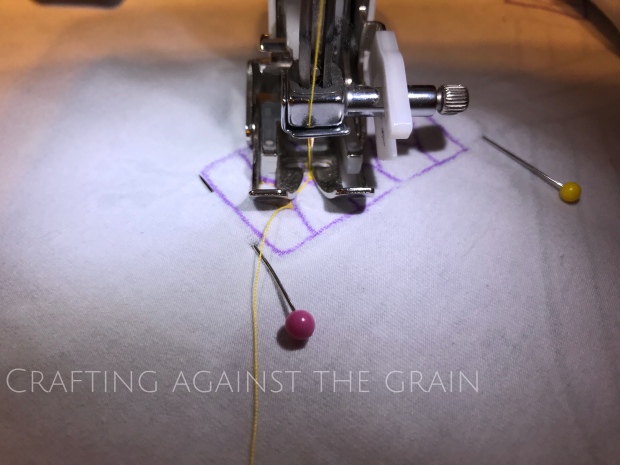
Ok, back to the applique process…Next, I sewed along the lines I wanted to have the appliques, making sure to put a couple of stay stitches at the beginning and end of my stitches. *Make sure when you do this, you are enclosing whatever shape you’re sewing so that your applique piece is completely sewn on all the way around it.
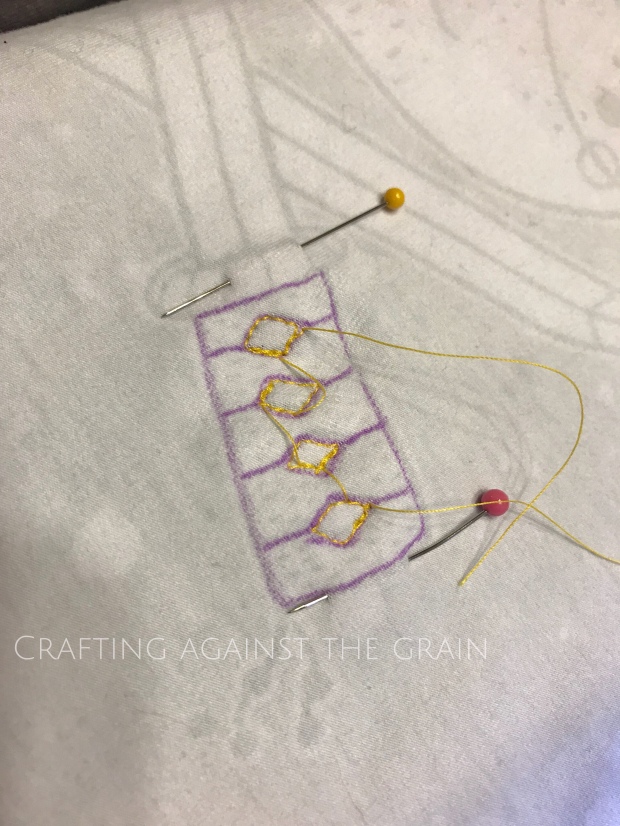
Once done, I removed the pins and flipped the panel over to see the right side. Here’s what it will look like…

Then, just take a pair of sharp, small scissors and cut away the excess fabric around the outside of your stitching. *Be sure to not cut too close to your stitches! You’ll want to leave a little bit of an overhang. Next, just pull your threads to the back and knot to secure them and your reverse-reverse appliqué is done!

Just continue these steps for each of the appliques you’d like to add to your panel! If you’re looking for great panels that are perfect for this process, including this one, head on over to RockerByeDestash Fabrics, where this great ninja fabric and these fireman prints are currently open for preorder through April 27th!


Alexis,
How about a blog post talking about creating this fireman jacket! It is fabulous!!!!
LikeLike
Thank you so much! I might have one in the works. 😉
LikeLike
Great tutorial, I’ll have to give it go one day!
LikeLike
Thanks Amy! I’m glad you enjoyed it!
LikeLike
Wow! Not the technique I had imagined or come up with when I was considering doing this, but it looks awesome! Absolutely against the grain and turned out amazing!
LikeLike
Thank you so much Marsha!
LikeLike
So cool! I can’t wait to try this!
LikeLike
I love this! Such a great idea!!
LikeLike
Thank you so much!
LikeLike
Love this blog,your picture editing is really good!Lots of love,keep blogging<3I'd love for you to check my blog out too!:)
LikeLiked by 1 person
Thank you so much and I am so glad that you enjoy it!
LikeLiked by 1 person