
Disclosure: This post may contain affiliate links, which means I may receive a commission if you click a link and purchase something. Please check out our disclosure policy for more details.
Well, it’s been a while since I’ve had the time to sit down and write! Summer around here has been crazy on the farm with hay season, new animals, and sewing projects filling in the rest of the time.
The other day I realized that summer is almost over and J will be starting preschool in under a month! I can’t even believe it! As I was perusing his school supply list, I noticed that on it was an art smock. After looking around a little, I realized that I could easily make one of my own! So I went on Pinterest in search of a free pattern and found this great one from The DIY Mommy. You can find the pattern here.
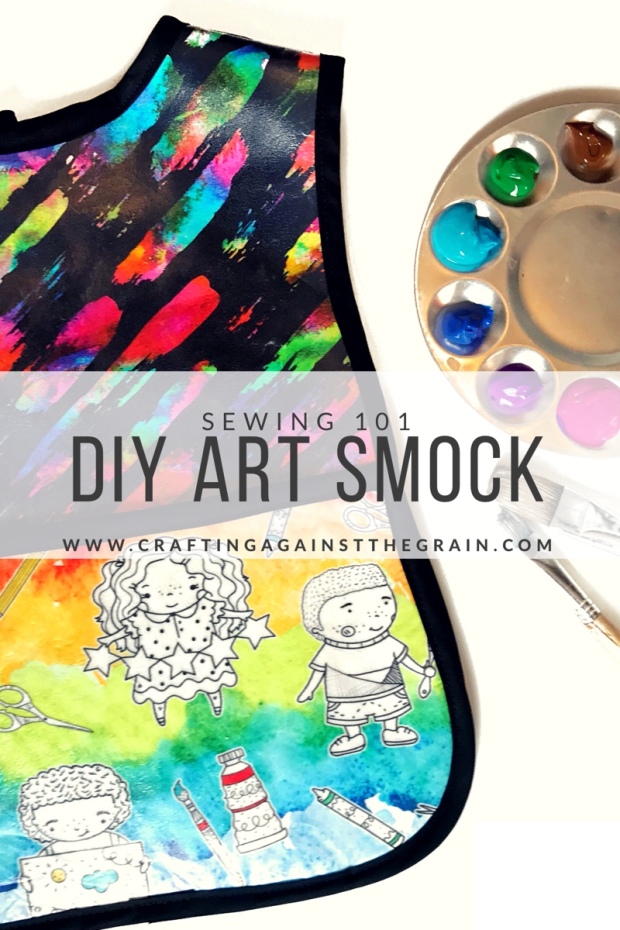 In her tutorial, she uses a pre-laminated cotton fabric. I didn’t have any on hand and I was wanting to use these amazing art print scraps from Rockerbye Destash instead, so I decided to laminate my own! So in search of clear vinyl I went. I ended up using Heat n Bond’s clear vinyl in Matte but they also have gloss available as well. I found both of them on Amazon.
Once you’ve chosen your fabrics and clear or gloss vinyl, you will cut out your pattern pieces from your fabric and then from your vinyl. I only laminated the outside of J’s smock, but you could easily do both sides. The pocket piece I added is laminated on both sides.
Next, you will head on over to your ironing board and iron. Set your iron to the wool setting and while it’s preheating, peel the paper backing off of your vinyl piece. Lay your vinyl, sticky side down, on the right side of your fabric, making sure to line up the edges. Then lay the paper piece you just pulled off, shiny side down, on top of the vinyl.
Take your iron and with medium pressure, press down for 8 seconds moving slowly until you have covered the entire piece. Flip your fabric over so the wrong side is facing up and again with medium pressure, press for 4 seconds moving slowly until the entire piece is covered. Peel the paper off of the front of your fabric and lay flat to cool. Once your pieces are cooled, you can sew your smock together following the instructions from The DIY Mommy!
 I got a little creative with mine and added a little applique with Heat Transfer Vinyl to the back of J’s before laminating the fabric as well as a pocket. As soon as it came off the sewing machine J was asking if he could try it out with his new paints and how could I say no!?

 Now that I’ve done it, I can’t wait to try laminating more projects such as booties, rain jackets, hats, etc. What other projects would you like to try to laminate?

This is super cute! I have a bunch of iron on vinyl I had purchased. It is good for diaper bags, lunch boxes, and anything you want to wash off. I haven’t tried it with my heat press yet, but I’m curious how that will handle it.
LikeLike
Those are such great ideas! I was going to try it with my heat press too but I wasn’t sure on temp so I figured I’d play it safe and just use the iron!
LikeLike
I get that, too. I’m going to do a test piece first before I try it with a pattern piece. Seems like it would be easier and would maybe hold better. I’ve had some separation on my kids lunch bags with the iron method.
LikeLike
Your talent is so amazing! This is so cute, and love the quote on the back. Always fun to see your things! Mickie
LikeLike
Thanks so much Mickie!
LikeLike
The teachers at pre-school will be talking about you! “Did you see what he’s wearing today!! OMG! “
LikeLiked by 1 person