

Disclosure: This post may contain affiliate links, which means I may receive a commission if you click a link and purchase something. Please check out our disclosure policy for more details.
The other day I was perusing the inter-webs searching for a pair of pleather moto leggings when I stumbled upon this pair from Spanx. I immediately knew that these were the ones I had been searching for! That is, until I looked at the price! All I could think was “man, I bet they are amazing” but I just couldn’t justify the price when I knew I could make something similar for much, much cheaper!

I decided to start with my favorite leggings pattern; The Peg Legs from Patterns for Pirates. You can find the pattern for free HERE. Be sure to also grab the free add on and maternity packs as well as some of their other great patterns! The new contoured waistband can be found in the add on pack. Next I picked up two yards of four way stretch pleather from the Fab Clique. You’ll want at least an extra 1/2 yard to account for the pleating details.
 Once I had all of my supplies gathered together, it was time to start figuring out the best way to approach the pleated panels. First, I printed out the regular peg legs pattern and the add on patterns. For this modification, you will need the leg portion of the normal peg legs pattern and your choice of waistband. I made these low rise with the new contorted waistband.
So the first step was to locate where to place the side seam on the leg pieces. I did this by folding my leg pattern piece in half so the edges lined up…just like when you sew the legs shut. Then I shortened the leg to the biker length. I cut a front half and a back half of each leg, mirrored, making sure to add seam allowance to the new side seam.
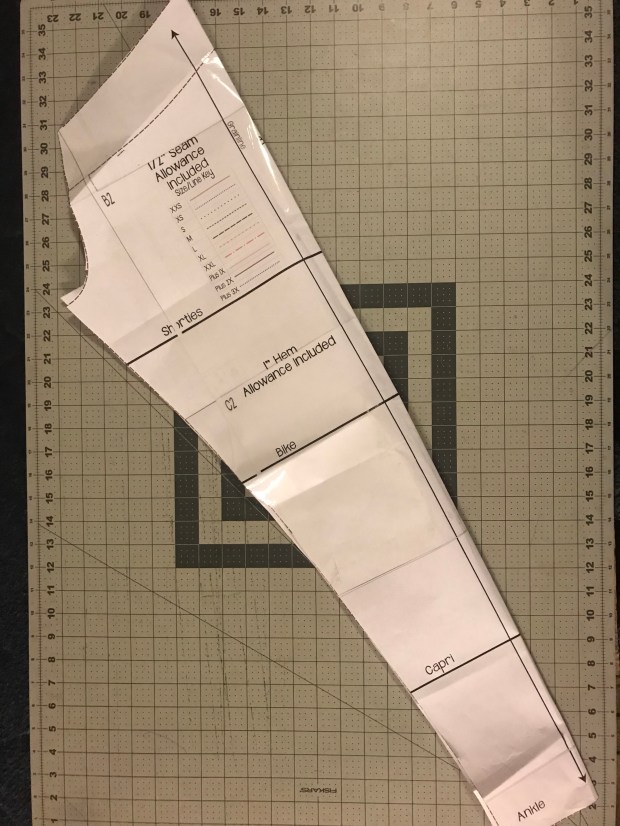
Next, I moved onto the lower half of my leg. On my pattern, I measured 4in plus double my seam allowance, down from the biker length line and drew a line straight across. This created the knee patch pattern. I traced this out onto a piece of scratch paper. *Now, I’m only 5’5″ so pegs normally run long on me, so I didn’t need to worry about cutting my seam allowance off of the length. If you are on the taller side and need those inches, you will need to add extra inches to account for seam allowance to your length. I cut two of these pieces mirrored.

Then, I once again folded my pattern in half and cut two fronts and backs, mirrored, from my newly drawn line (the bottom of your knee patch) down to the bottom of the leg. *Sorry I forgot to grab a photo of this.
Now it was time to figure out the moto patches. I measured from where the side seam hits on my thigh and calf and then decided where I wanted it to hit on my inner leg. Here is a photo of the shapes and measurements of the pieces I used to cut out my moto pieces. Once I had those patterns figured out, I cut them out of my front leg pieces making sure to add seam allowance.

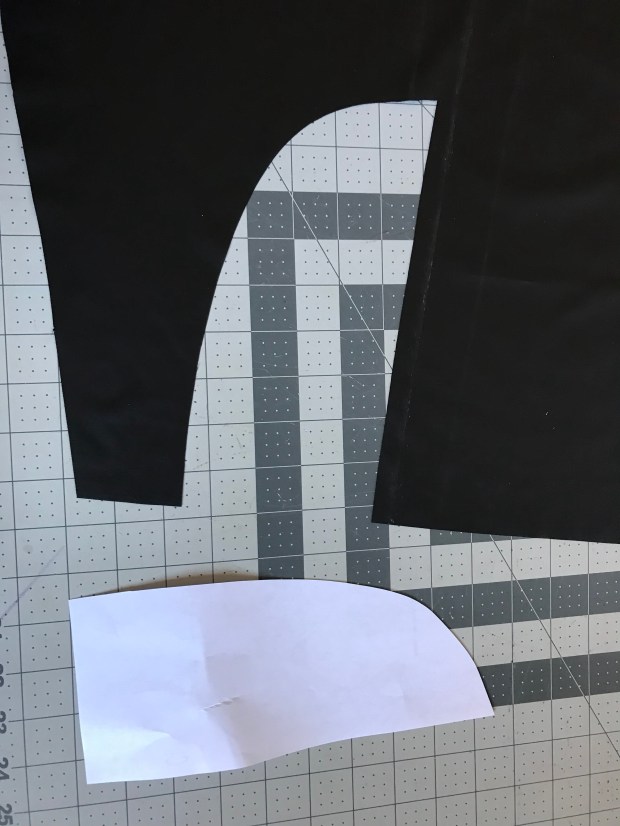
*Ignore the chalk line please! This was the first leg I did before I cut the top into two pieces. The side cut line continues from the straight line of the pattern piece/cutout.
Onto the pleating! I ended up making way more pleating than I actually needed because I wanted my pleats to go on an angle. So I started with a little less than a half yard. I did a basic knife pleat at a 1/2in. There are a bunch of good videos on how to do a knife pleat on YouTube if you’d like a tutorial. I will admit, it’s difficult and time consuming on pleather since you can’t really iron it and you don’t want to use pins. But it really is pretty when it’s done. *Make sure you use a longer stitch length and a stretch stitch for you ur pleating.

Once I had my piece of pleather pleated, I laid it out with my front piece on top of it to determine the angle I wanted the pleating to have. Then I laid my pattern piece in the space and removed my front pieces. Next I cut them out with added seam allowance for both legs, making sure to mirror them. I repeated these steps for the lower leg patches as well.

To finish up, I sewed my pleated moto patches onto my front pieces and topstitched the seams down. Next, I sewed my top front to the top back at the new side seam. Then I sewed my knee patch piece to my completed top piece and topstitched the seam down. After sewing up the new side seam on the lower leg, I sewed it to the bottom of my knee patch and topstitched. Then I completed sewing my new leggings according to the instructions included in the peg leg patterns.
Congratulations! You’ve made it all of the way through this lengthy modification…yay!! I hope this helps you create your own amazing pair of moto peg legs! If you make a pair please tag us: @craftingagainstthegrain I’d love to see them! ❤️
I paired my leggings with this amazing Vikings inspired fabric from Fabric Anthropology. You can check out all of their amazing and unique fabric HERE! I really feel they helped bring the “Vikings” theme to life. My jacket pattern is the Jordis from Finnleys Patterns with some fun added accents.

*Disclosure: This post may contain affiliate links, which means I may receive a commission if you click a link and purchase something. Please check out our disclosure policy for more details.
